

Effective time management is essential for developers in Azure DevOps, where balancing code quality and deadlines relies on precise time tracking. If you’re using 7pace Timetracker, you already know its seamless integration with Azure DevOps — but are you using it to its full potential?
In this post, we’ll explore the ways to efficiently track your time with 7pace Timetracker. Whether you need to log time for a single item or update stats for the week or month, the app makes it easy.
4 ways to keep track of time
Every developer has their own approach to time tracking—some log time consistently, while others prefer doing it in bulk weekly or monthly. Whatever your style, your time-tracking app should support it.
With 7pace Timetracker for Azure DevOps, you have four ways to log your time. Let’s break them down to find the best fit for you.
Directly in your work items
“How long will this take?” is one of those questions developers dread — it’s hard to predict. But once the work is done, you know exactly how long it took.
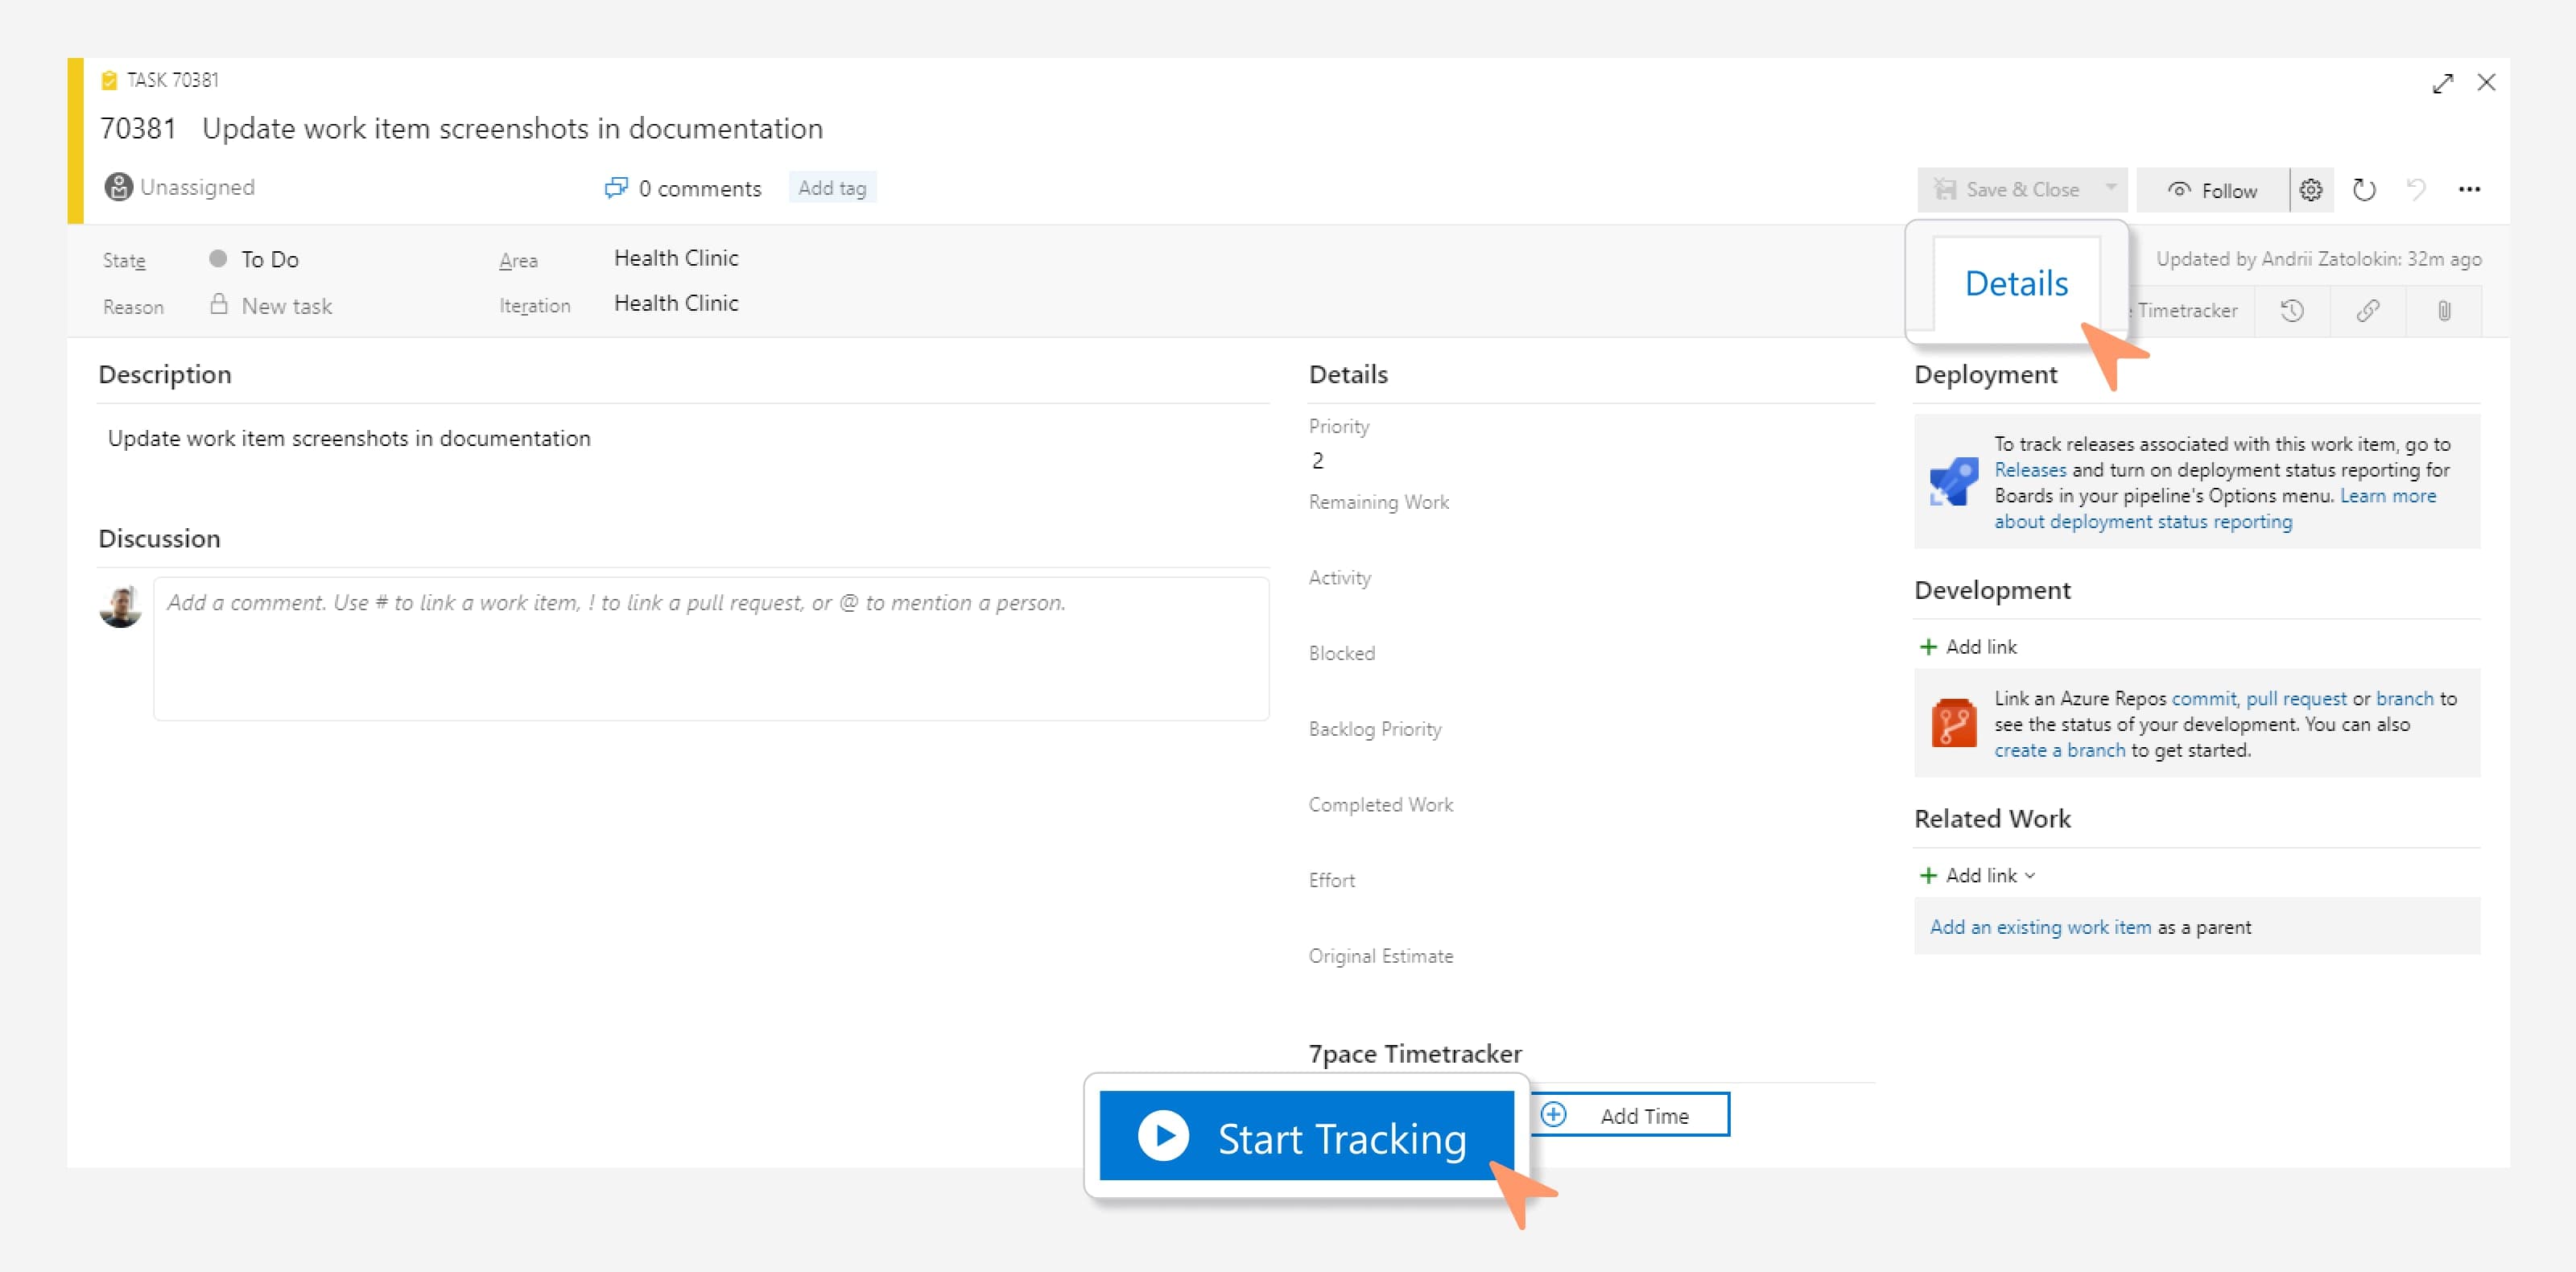
Need to log time for a work item? You can do it directly in the item form in Azure DevOps, the easiest and fastest way to track time. You have two options:
- Start tracking: Launch a timer to track your progress in real time, ideal for precise tracking.
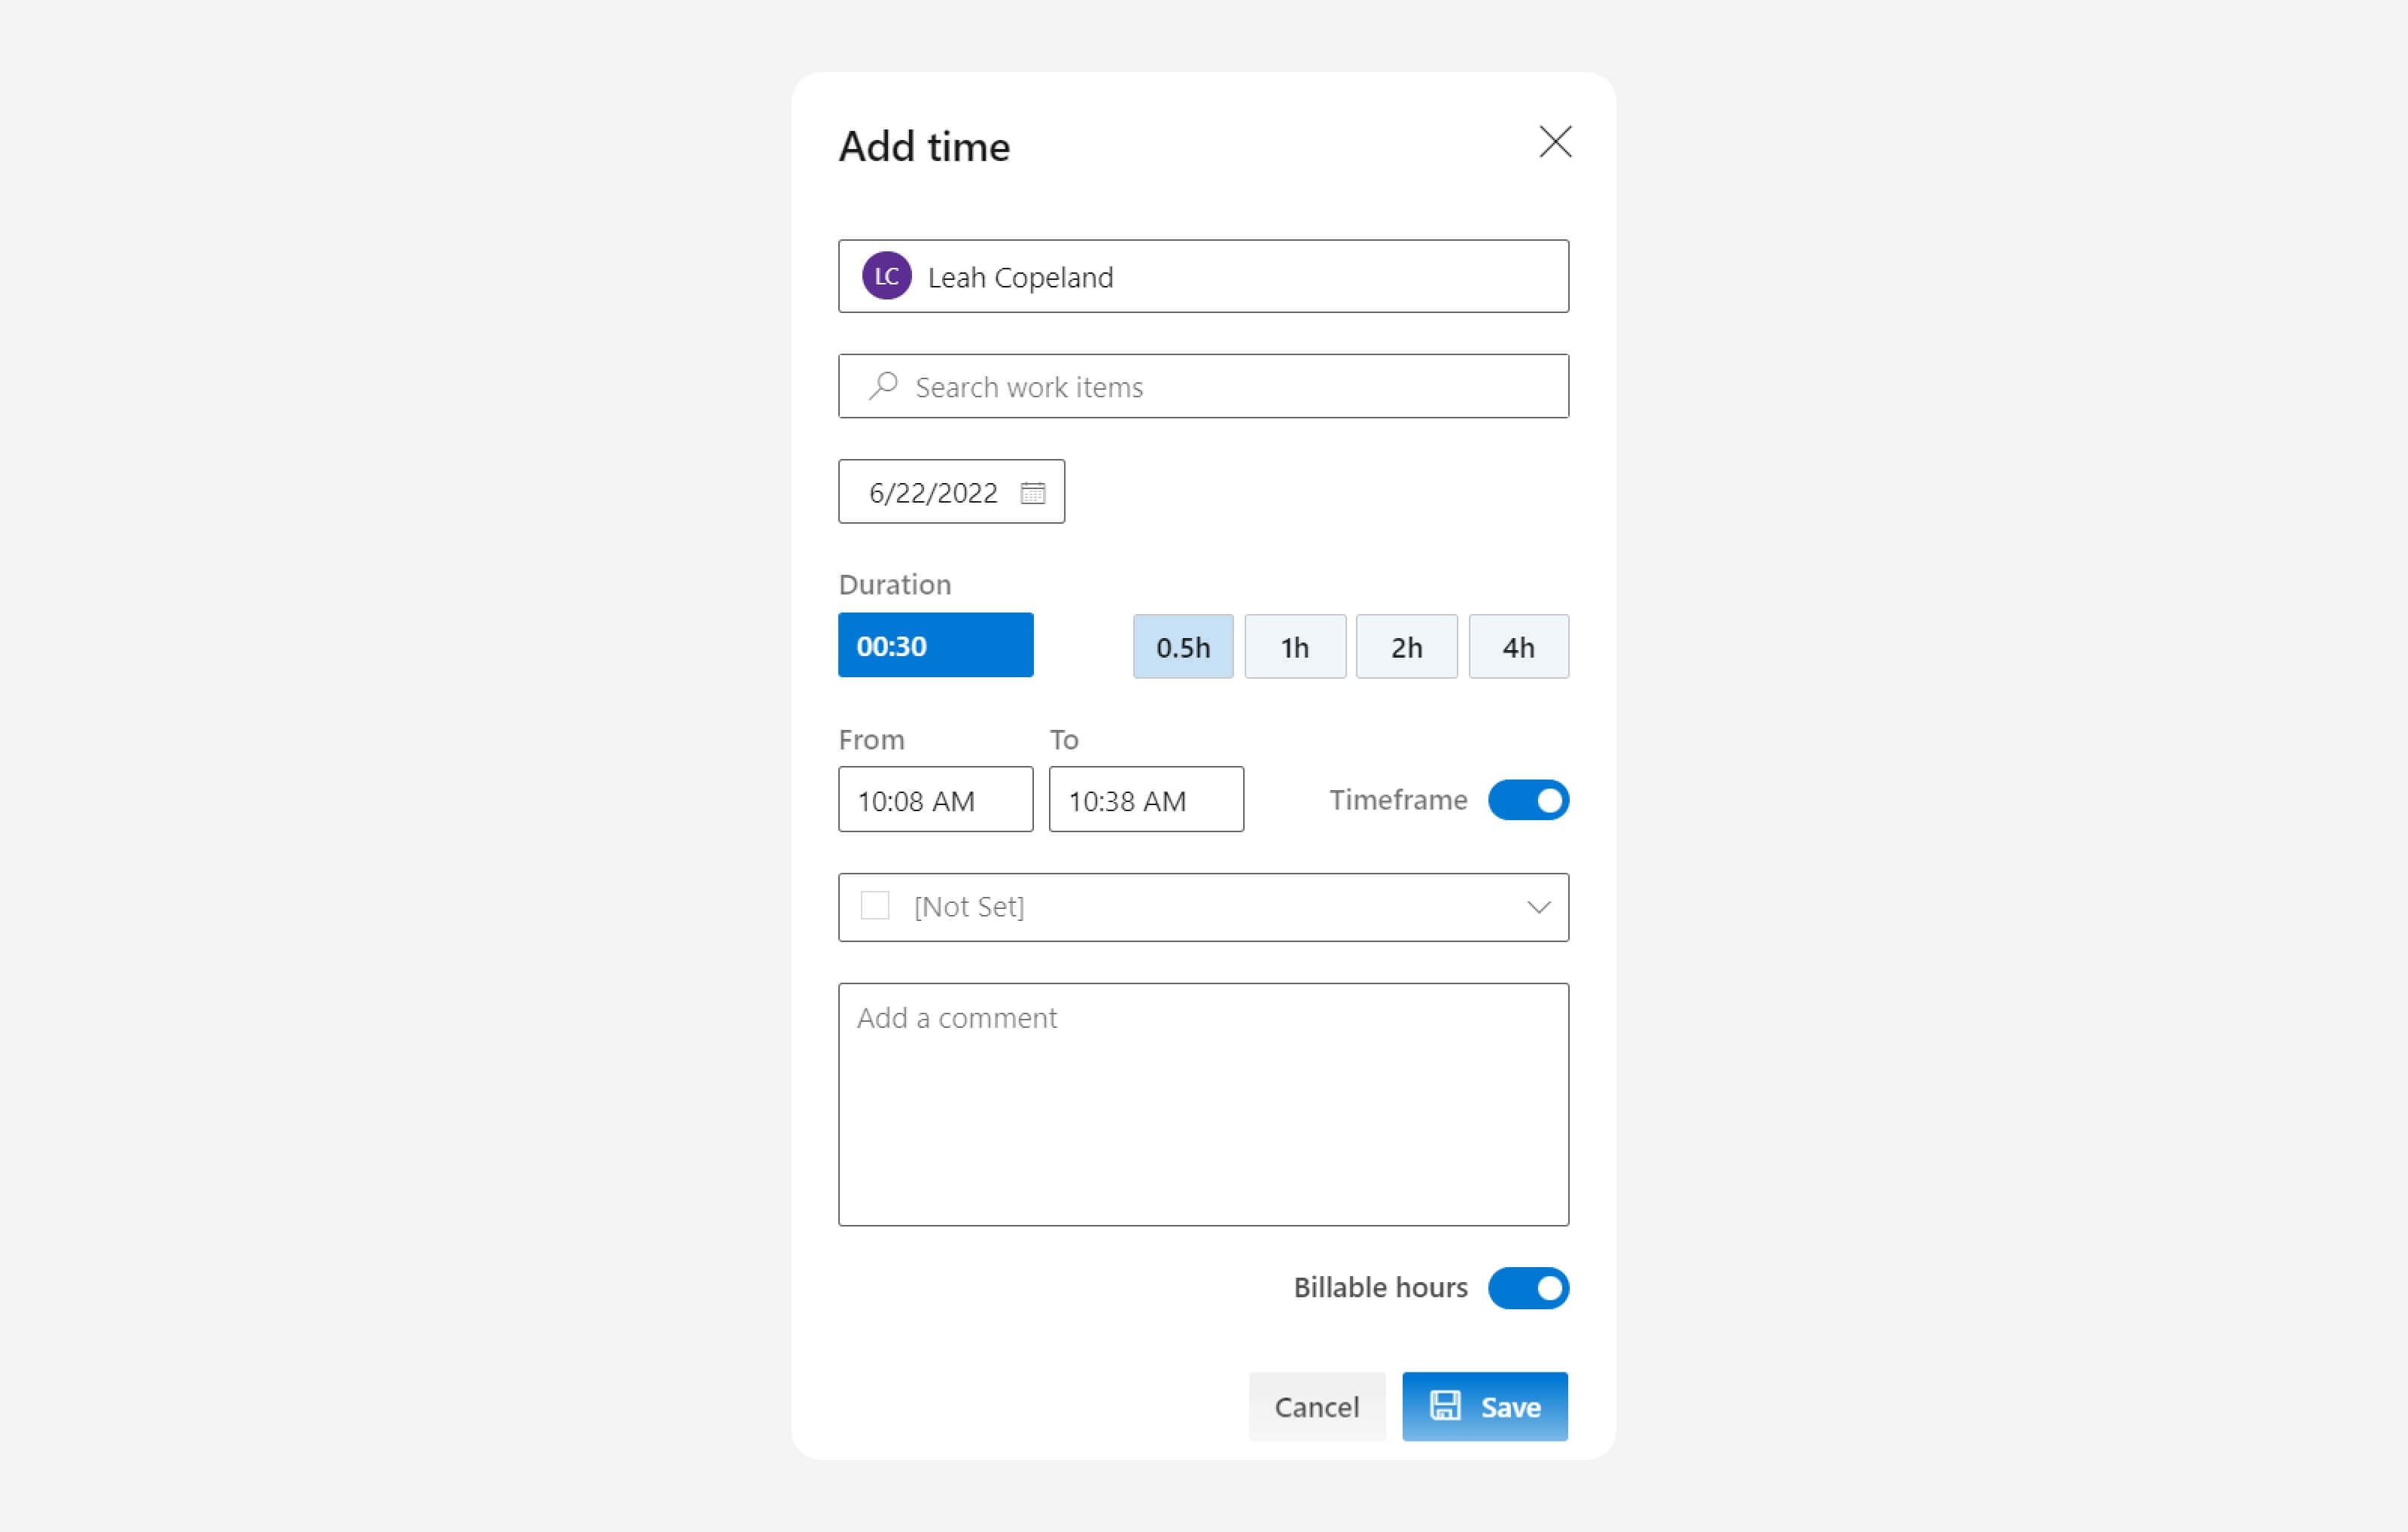
- Add time: Quickly log time by entering the duration or start and end times for more accuracy.
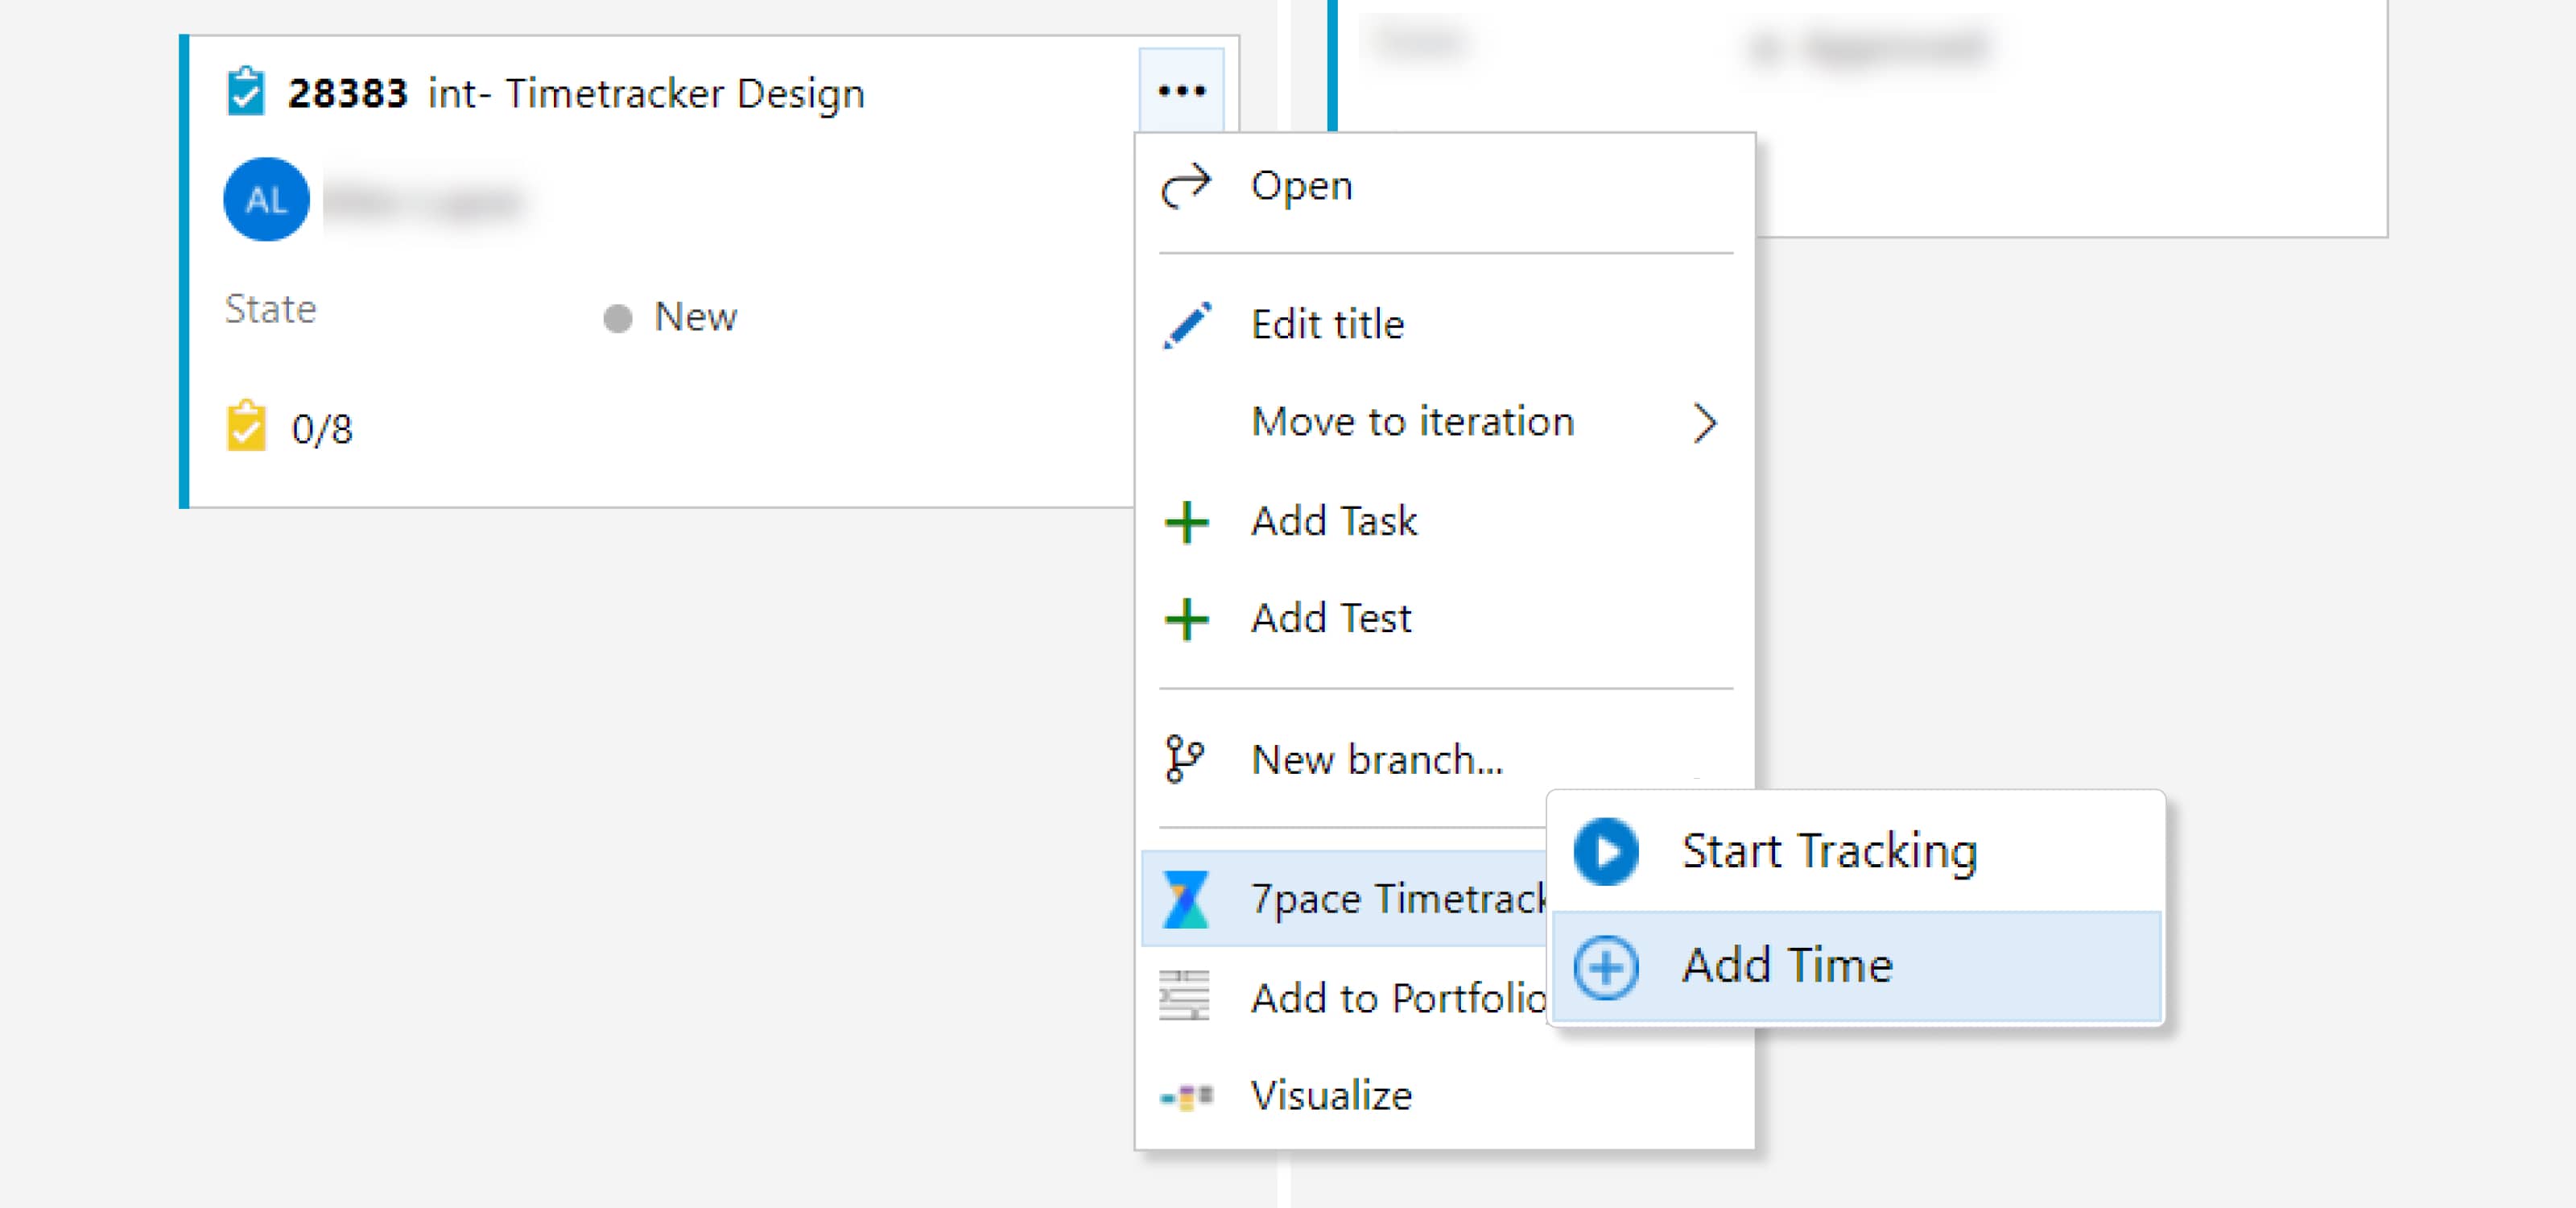
You can also start tracking time directly from the Boards tab. Whether it’s Boards, Backlogs, or Sprints, just click the three dots next to the work item’s name and select “7pace Timetracker.” From there, you can either start the timer or open the Add Time dialog, just like in the item form.
Time tracking directly in work items is ideal when you need to quickly log time or ensure your time data is up to date. This method keeps your time tracking accurate in real time.
For example, start the timer when moving an item from “To Do” to “Doing” and stop it when changing the state again. Or, add a time entry when transitioning from “Doing” to “Done.”
7pace Timetracker also helps you organize other data. With a single click, you can mark a time entry as “Billable hours,” ensuring your manager knows which work is billable without needing to ask.
You can also quickly categorize work by activity type, which is especially useful in Agile projects where multiple team members contribute to the same item in different capacities.
In the Weekly view
But what if you wanted to visualize your time data in the context of your entire work week? That’s exactly what the Weekly view does. It displays your worklogs on a neat calendar-like grid, allowing you to add and manage time in a new way.
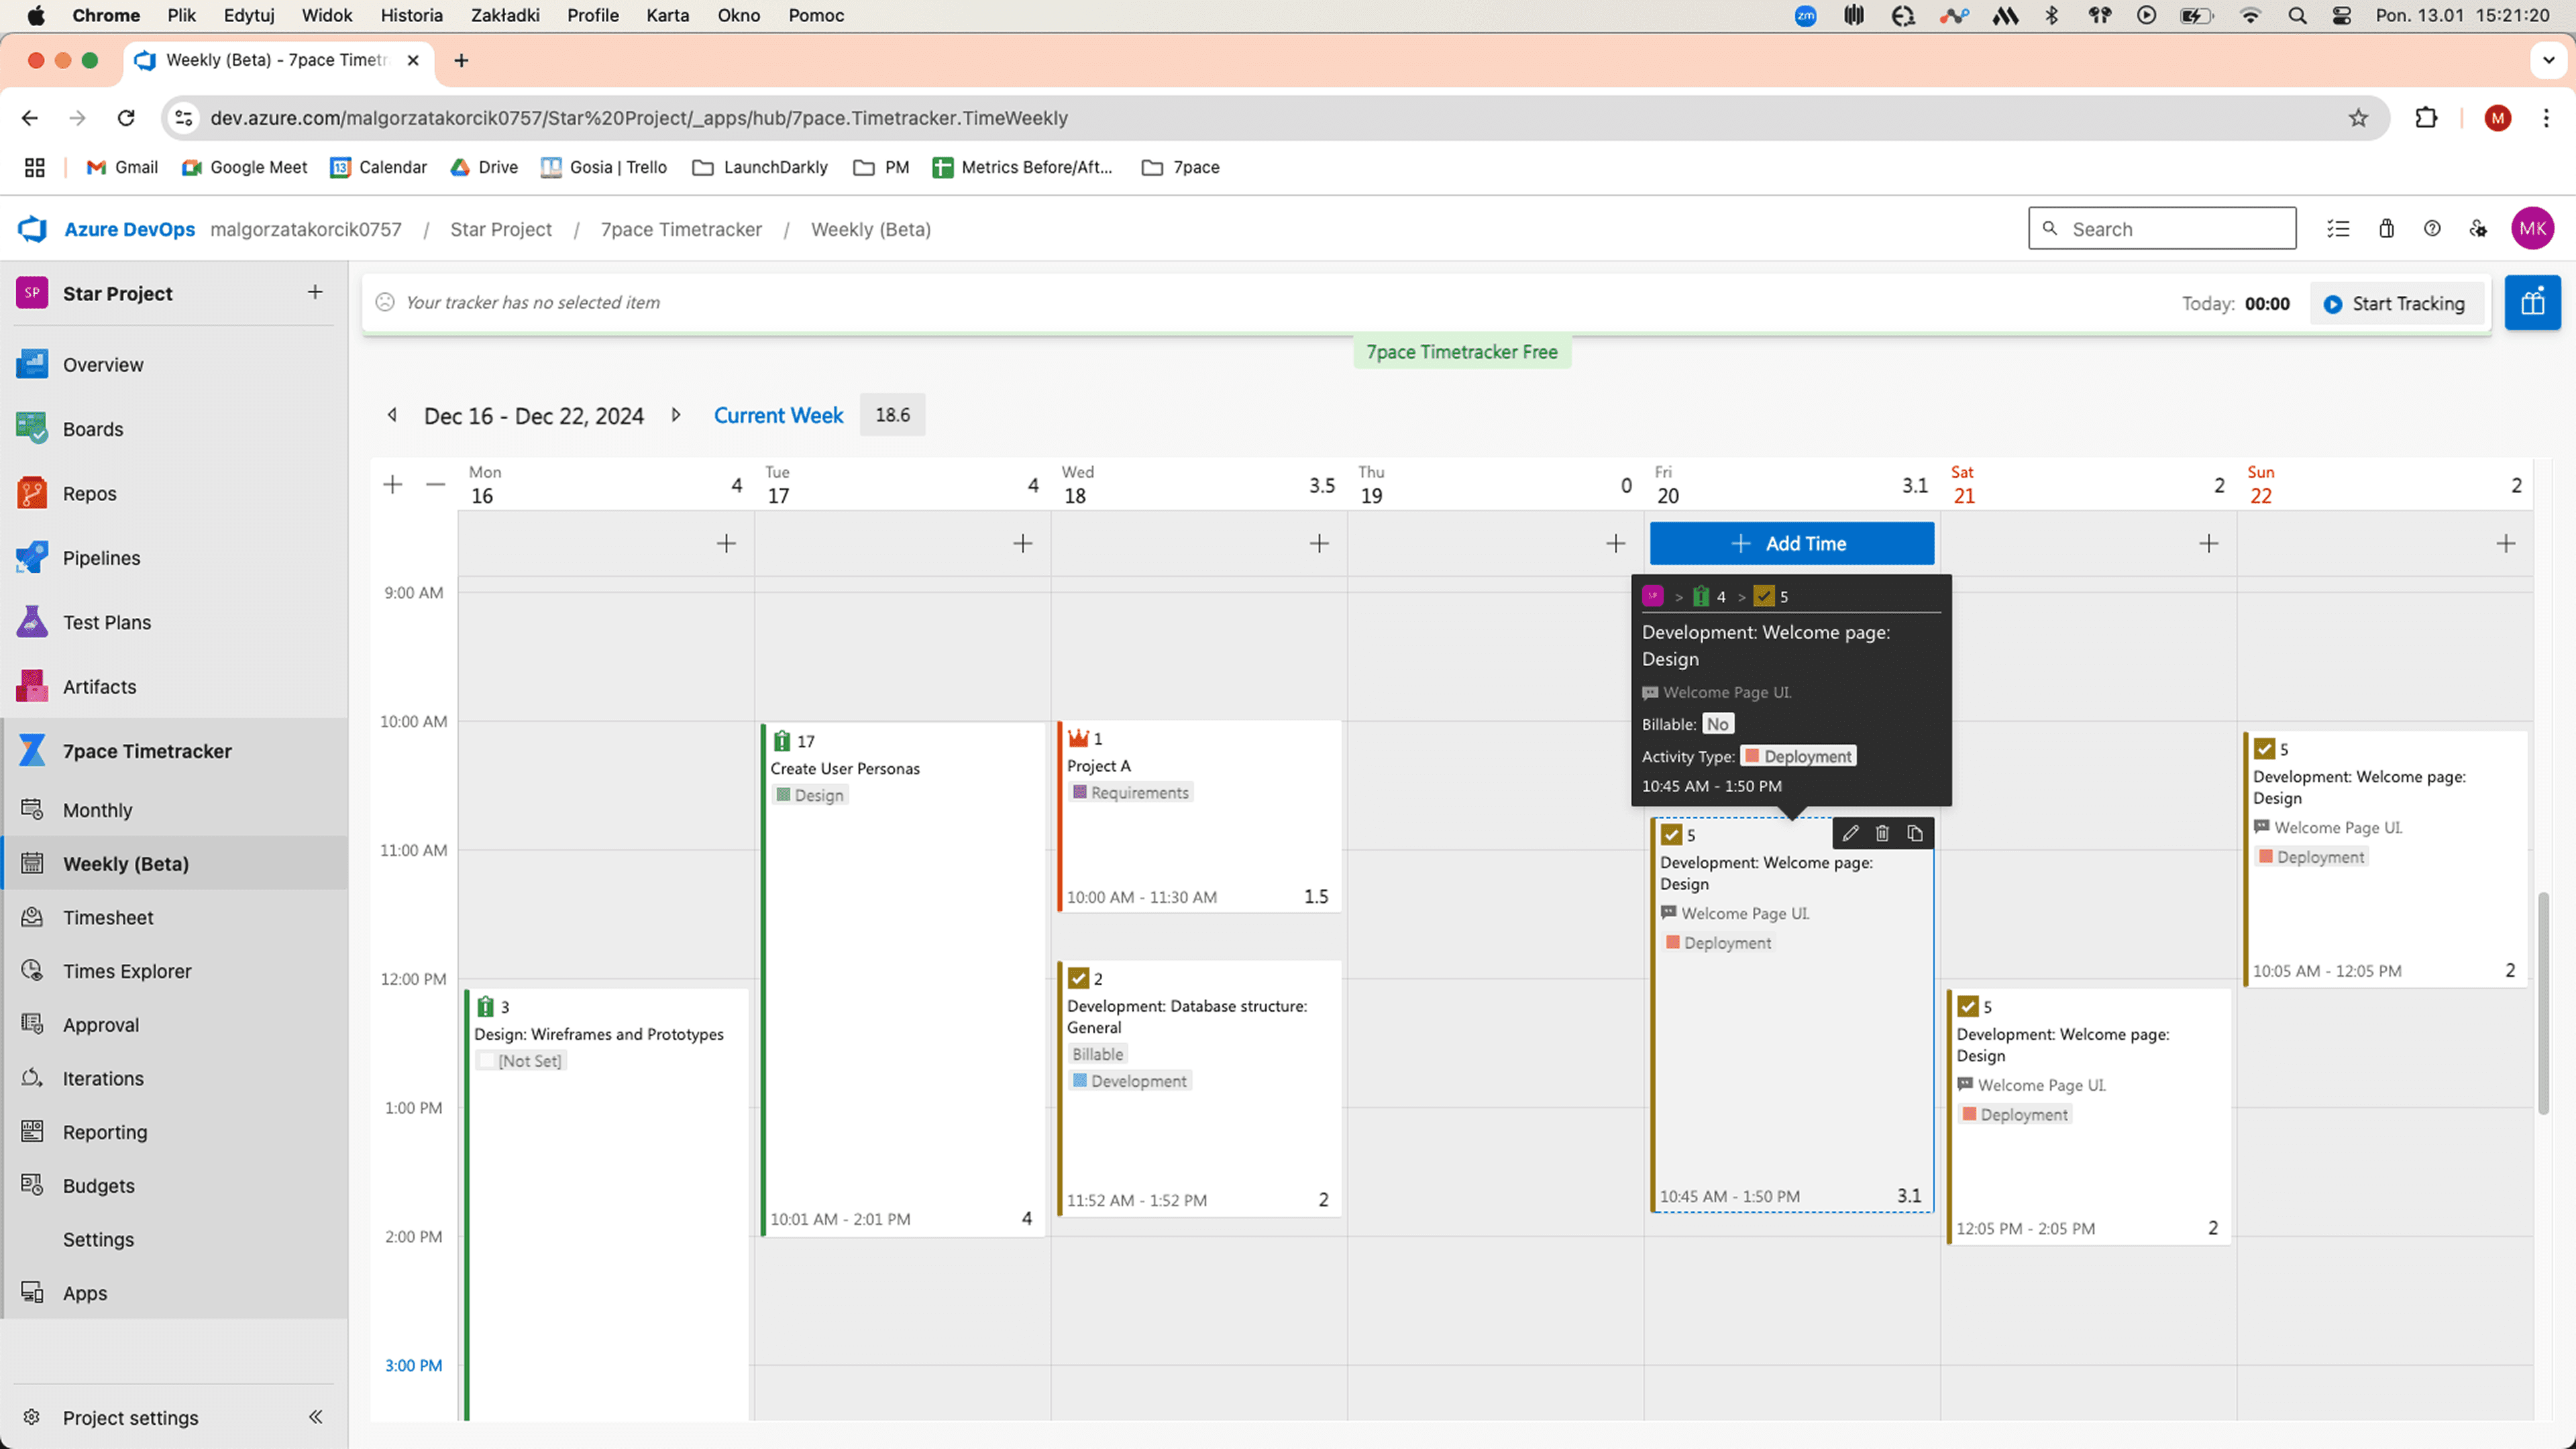
The Weekly view gives you a more comprehensive look at the entire week at a glance. Adding a worklog is now easier and more precise than ever thanks to drag and drop. To provide extra context to your time data, you can still use the Add Time dialog.
What’s great about the Weekly view is you don’t have to track work items. Instead, just add a comment to your worklog without assigning a work item. That’s perfect for keeping track of meetings and focus sessions that don’t have any specific work attached to them.
What if you’re working on the same item throughout the week? You can duplicate logs in a matter of seconds. Copy it as many times as you wish and change its duration with drag and drop.
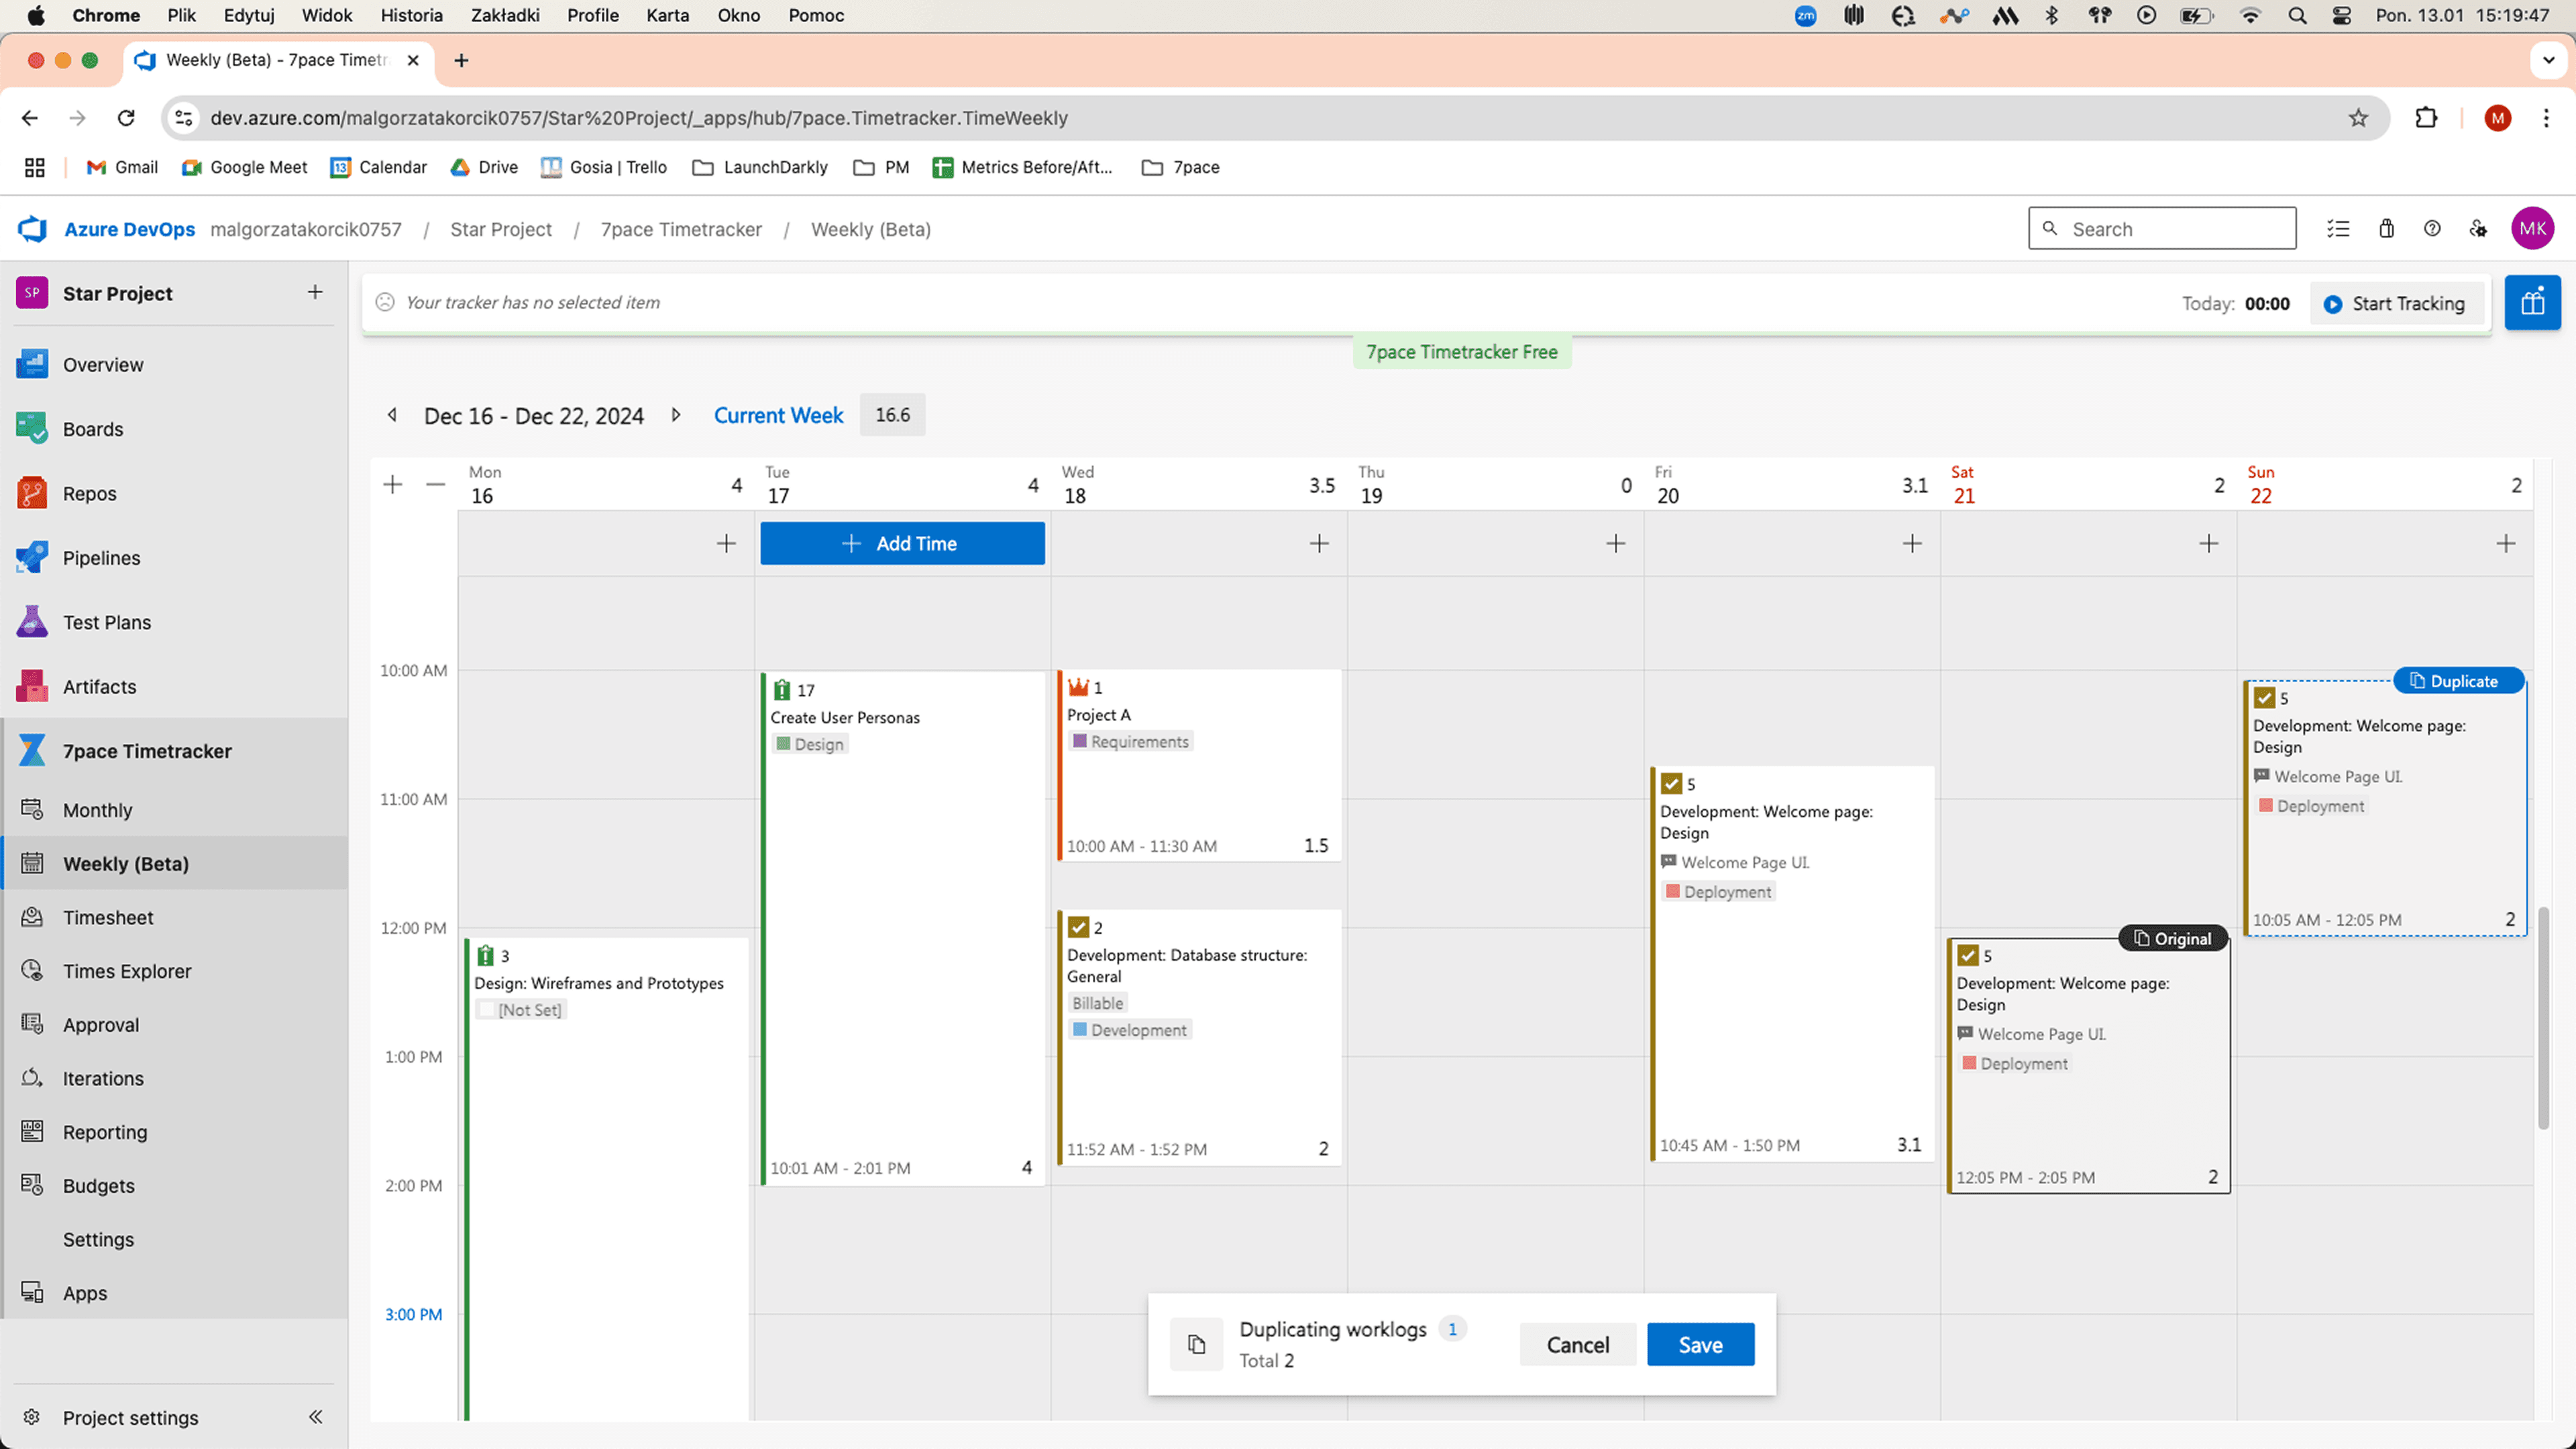
The Weekly view also shows you the sum of all your worklogs for each day and the entire week. That way, the total stats of your weekly activity are easily accessible.
In the Timesheet view
It’s Friday, and you need to submit your time stats, but you haven’t been logging consistently. Entering time for each item one by one would take too long.
No worries — the Timesheet view has you covered. It shows every work item you've tracked time on for the week, with spreadsheet-like cells for each day where you can quickly add or modify time logs.
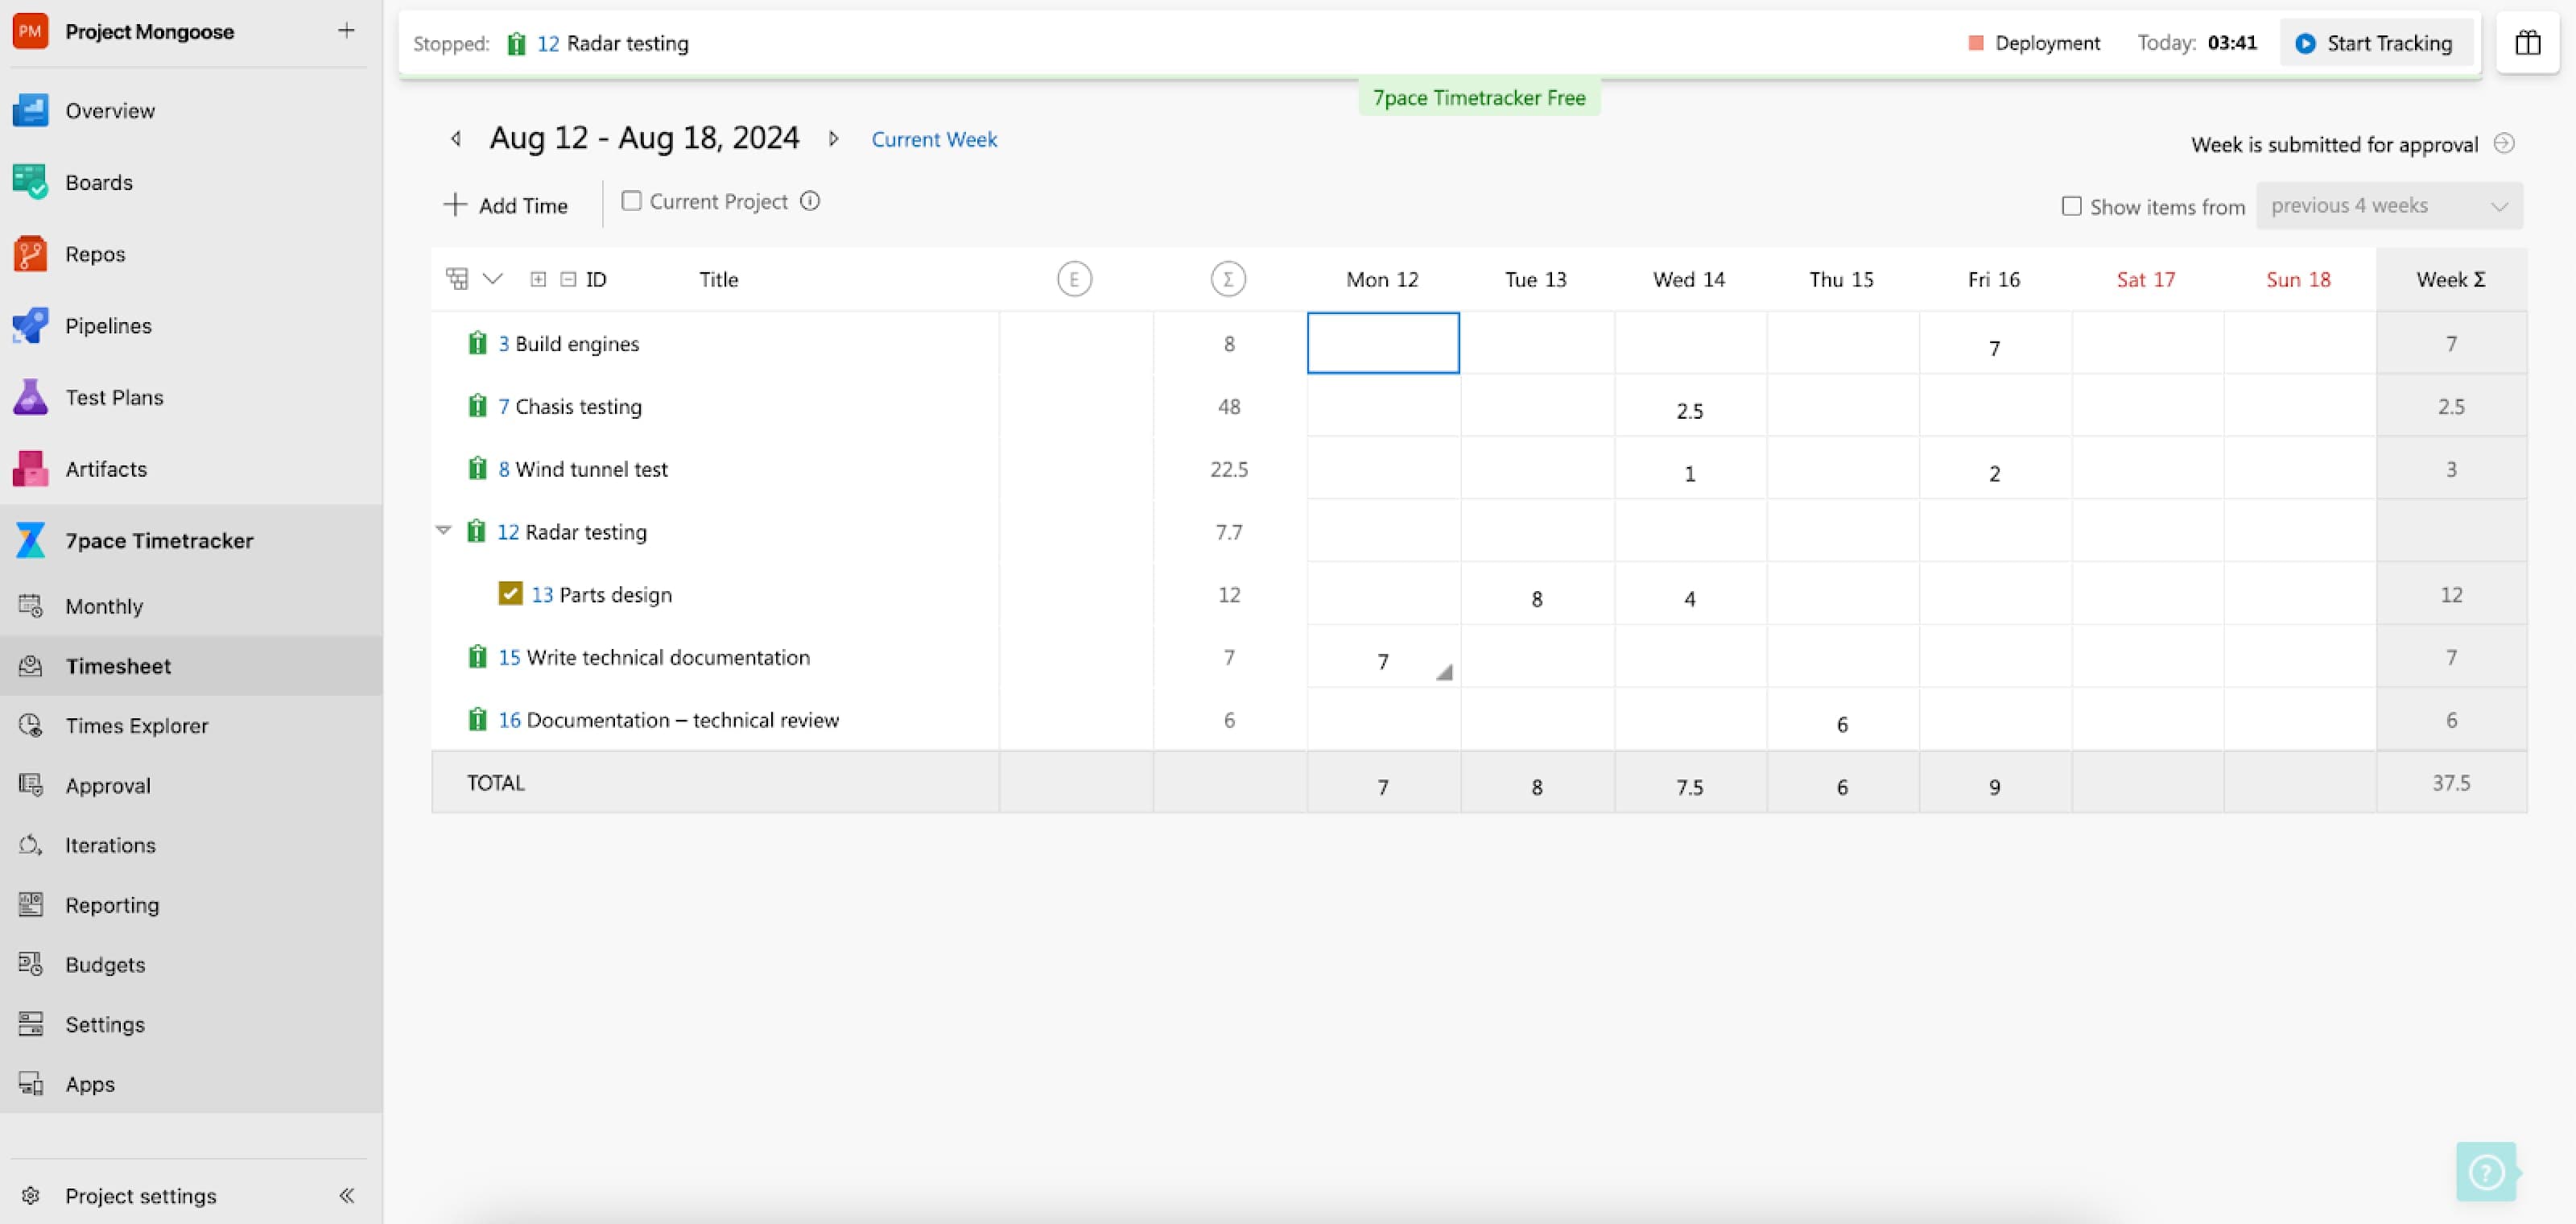
What if you didn’t track time for an item all week? It won’t appear in the Timesheet view at first, but you can easily add it by using the “Add Time” dialog. Just type in the item name, fill out the time stats, and include activity type and billable data if needed.
The Timesheet view shows aggregated values for each day and work item, giving you a clear overview of your weekly work.
Need to submit timesheets for approval? While Azure DevOps doesn’t offer this feature natively, 7pace Timetracker makes it easy — just send your timesheet to your manager with a single click.
It’s an efficient way to organize your time stats and submit your timesheet quickly.
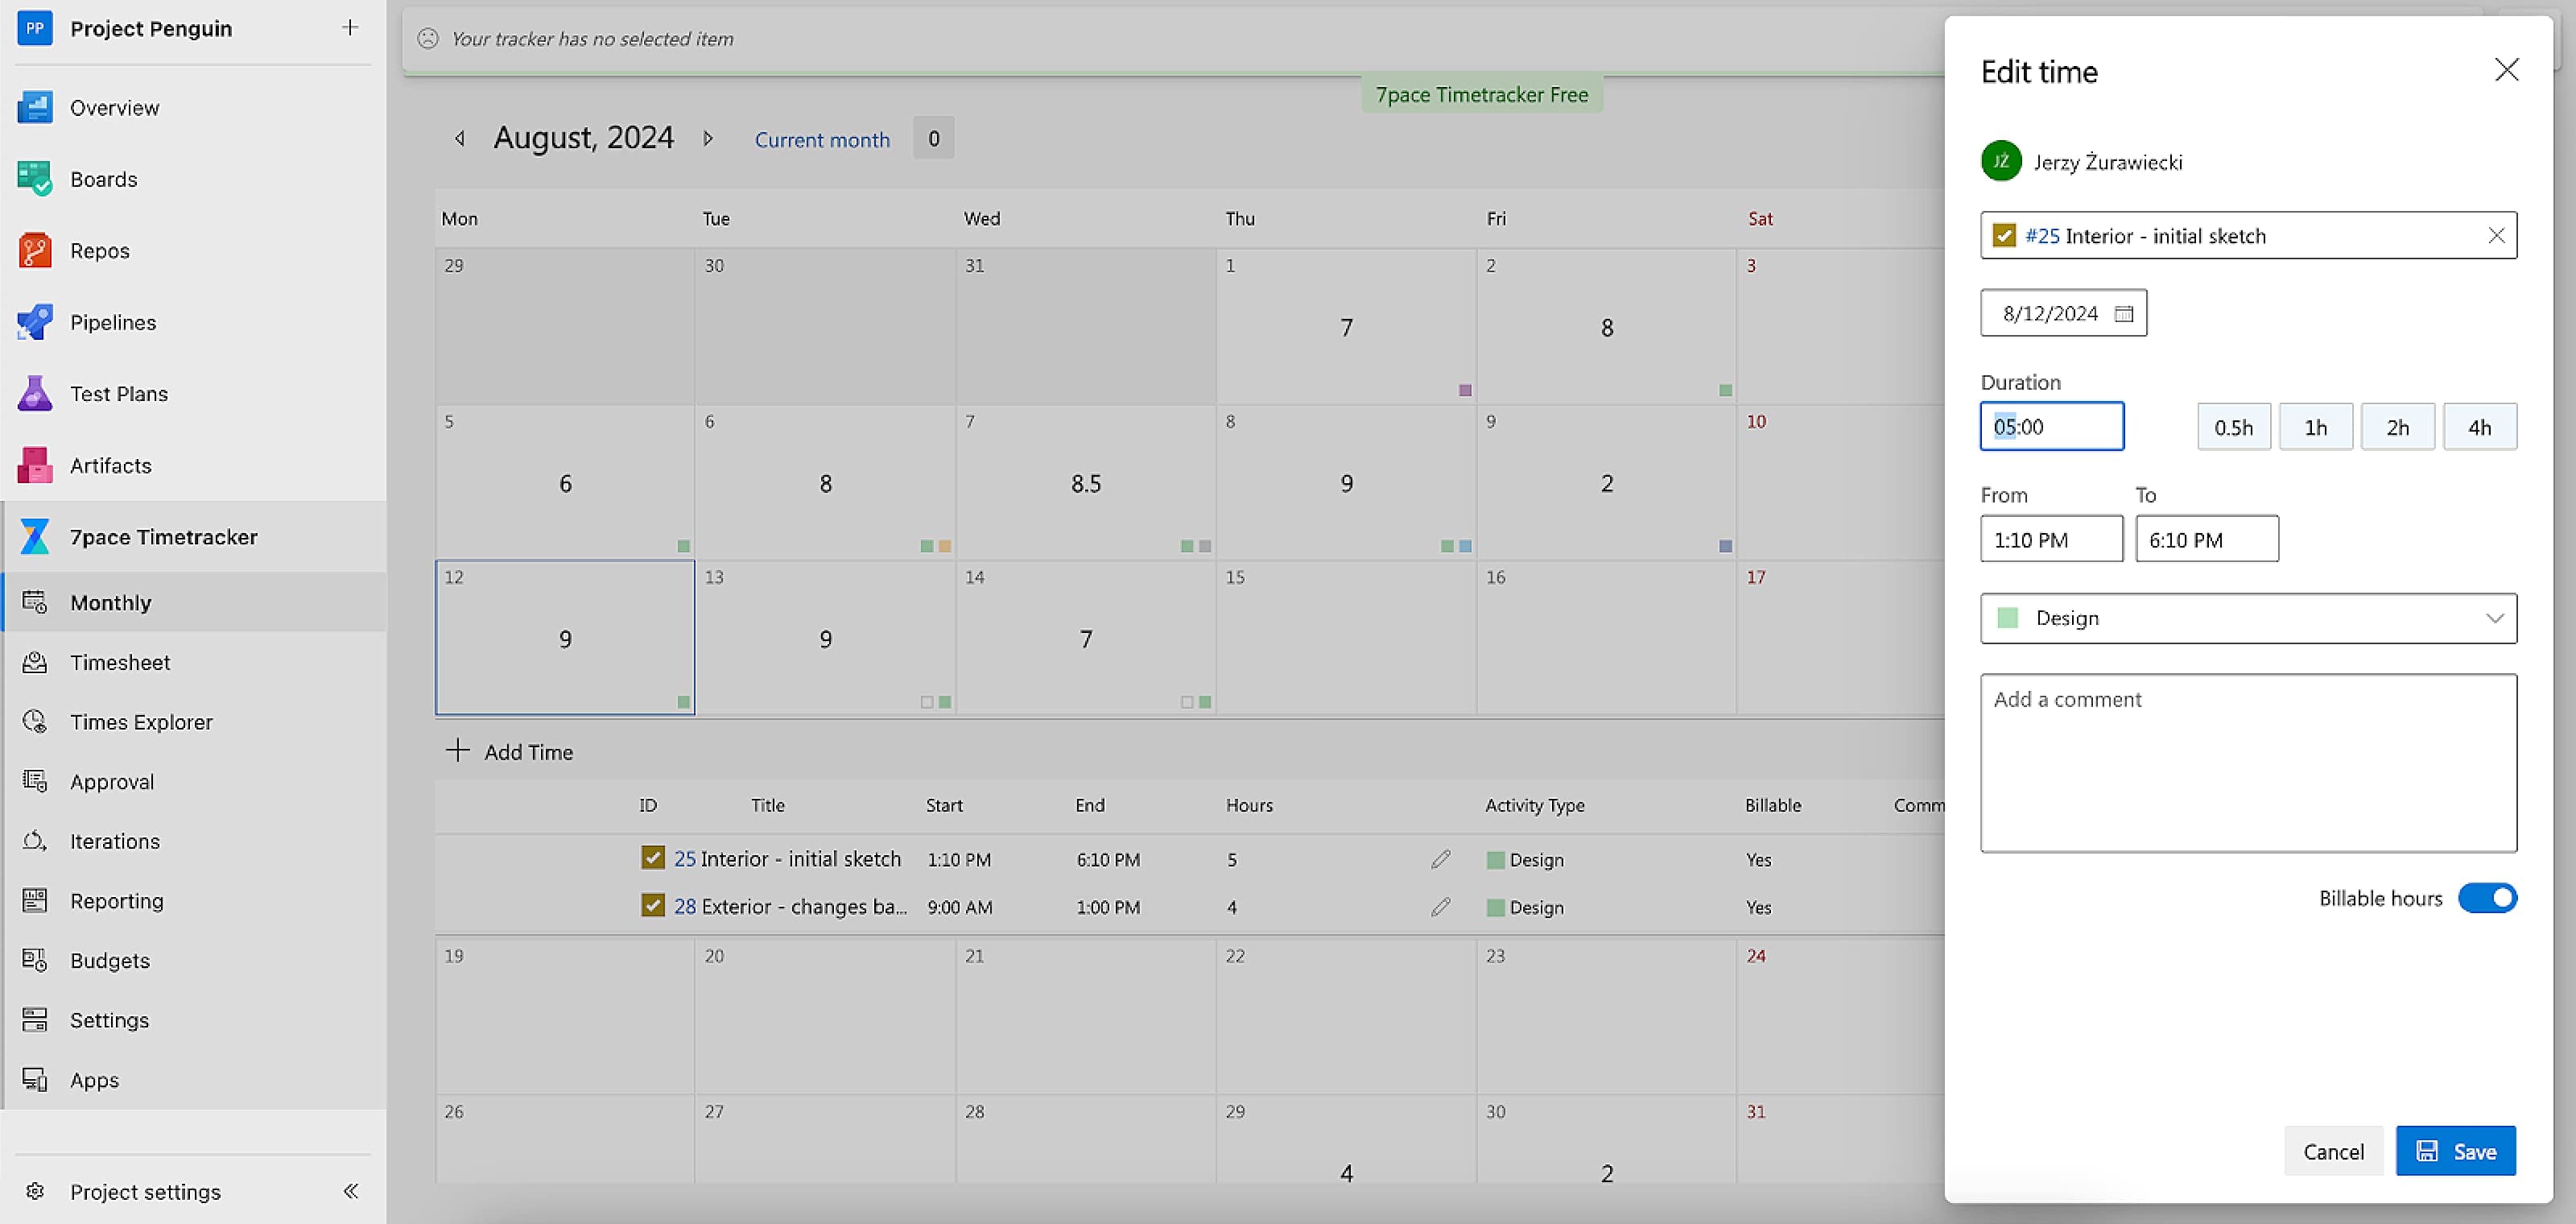
In the Monthly view
Want to see your time stats for the whole month? While Azure DevOps doesn’t offer this, 7pace makes it easy with the “Monthly” tab.
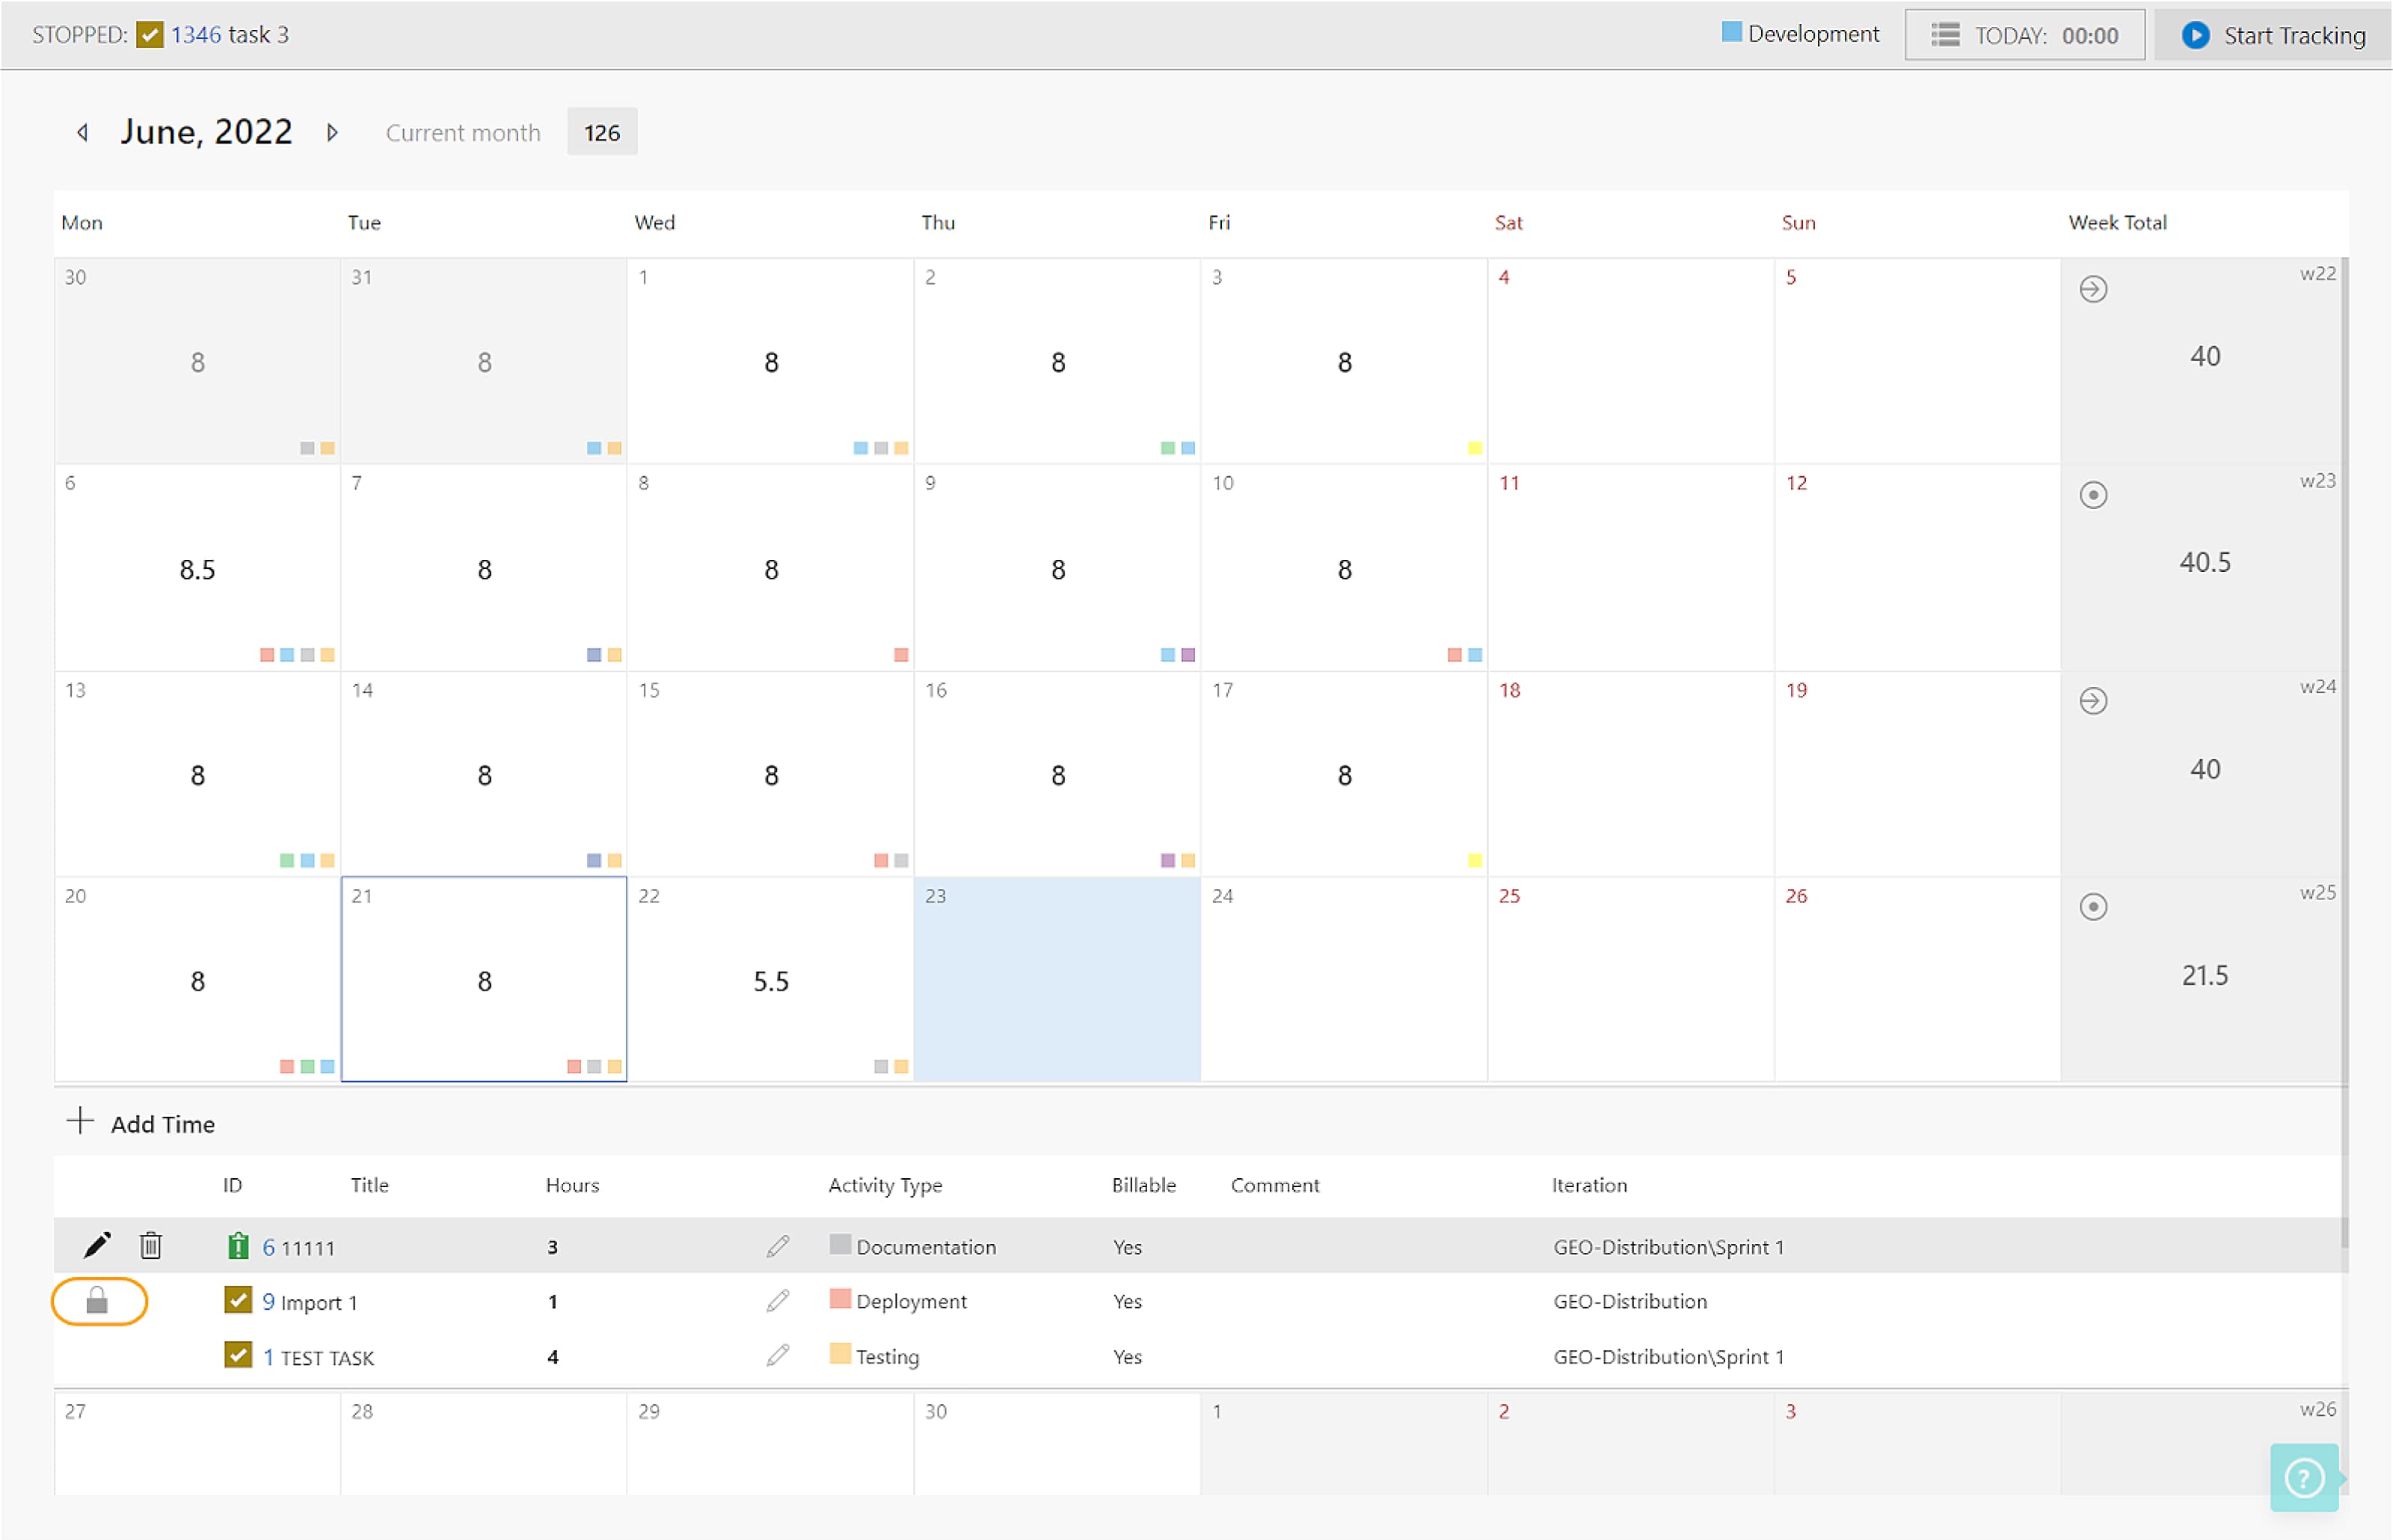
The calendar-like view shows each day’s total logged hours and icons for activity types. You’ll also see weekly totals in the right column and the total hours logged for the month.
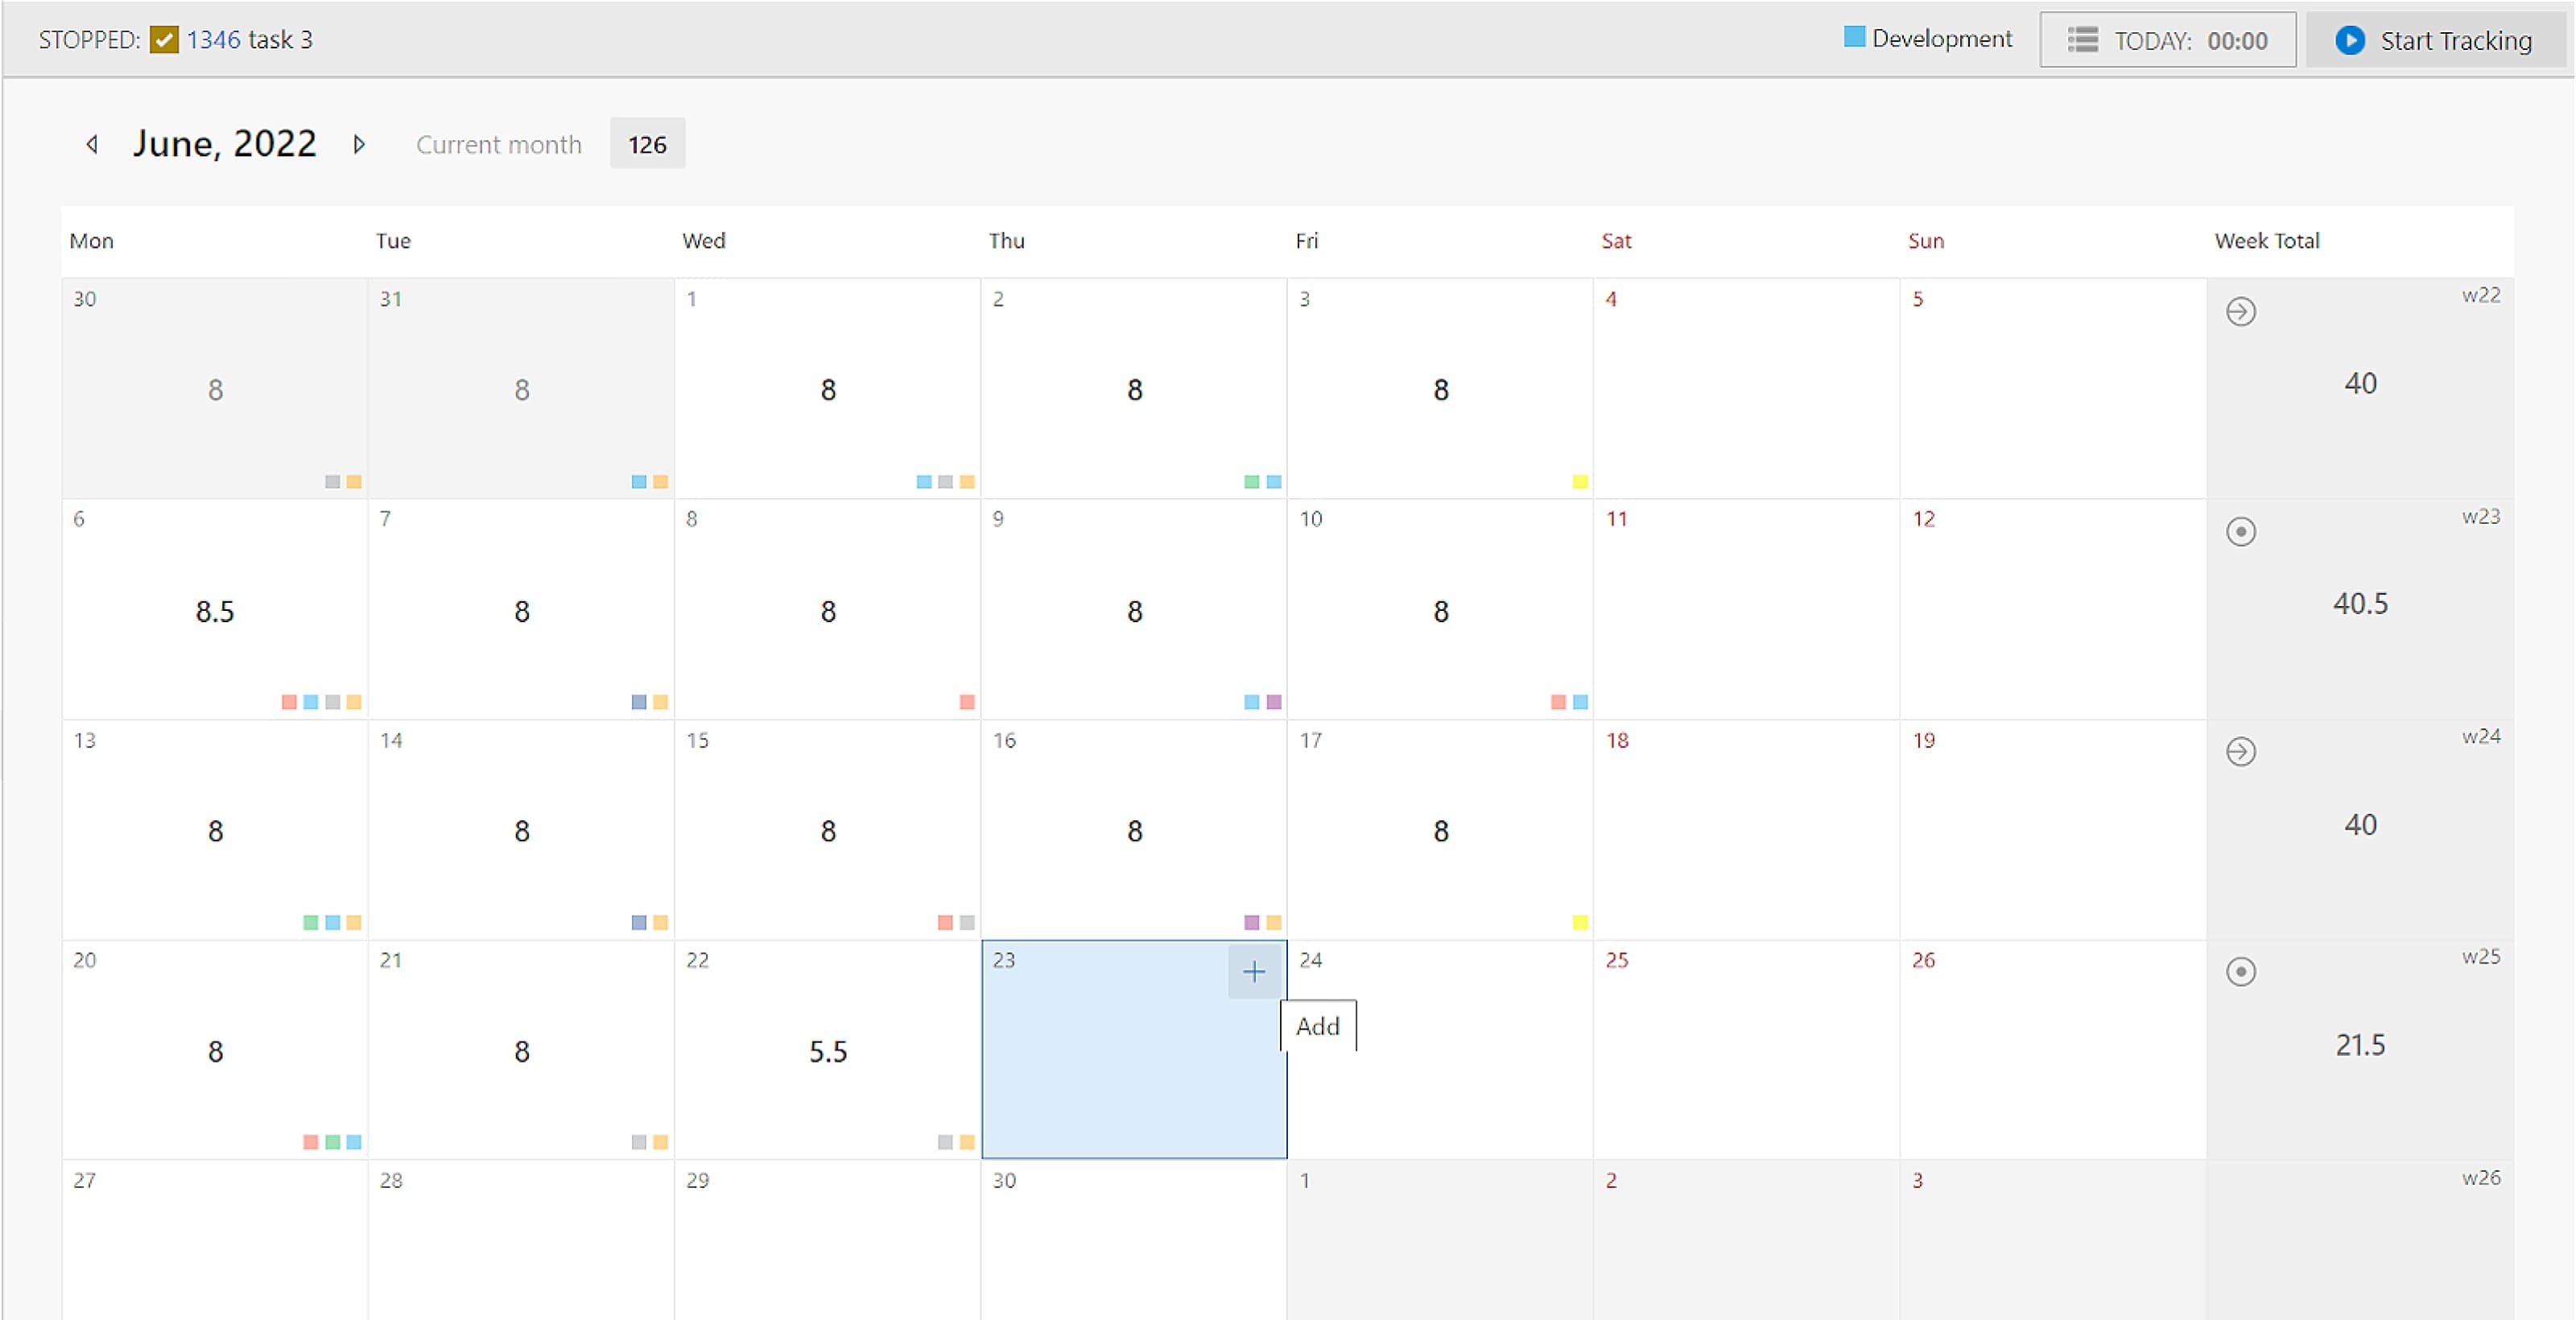
In the Monthly view, you can also add, edit, or remove time logs. Just click on a day, and a breakdown of all your logs will appear under the tile.
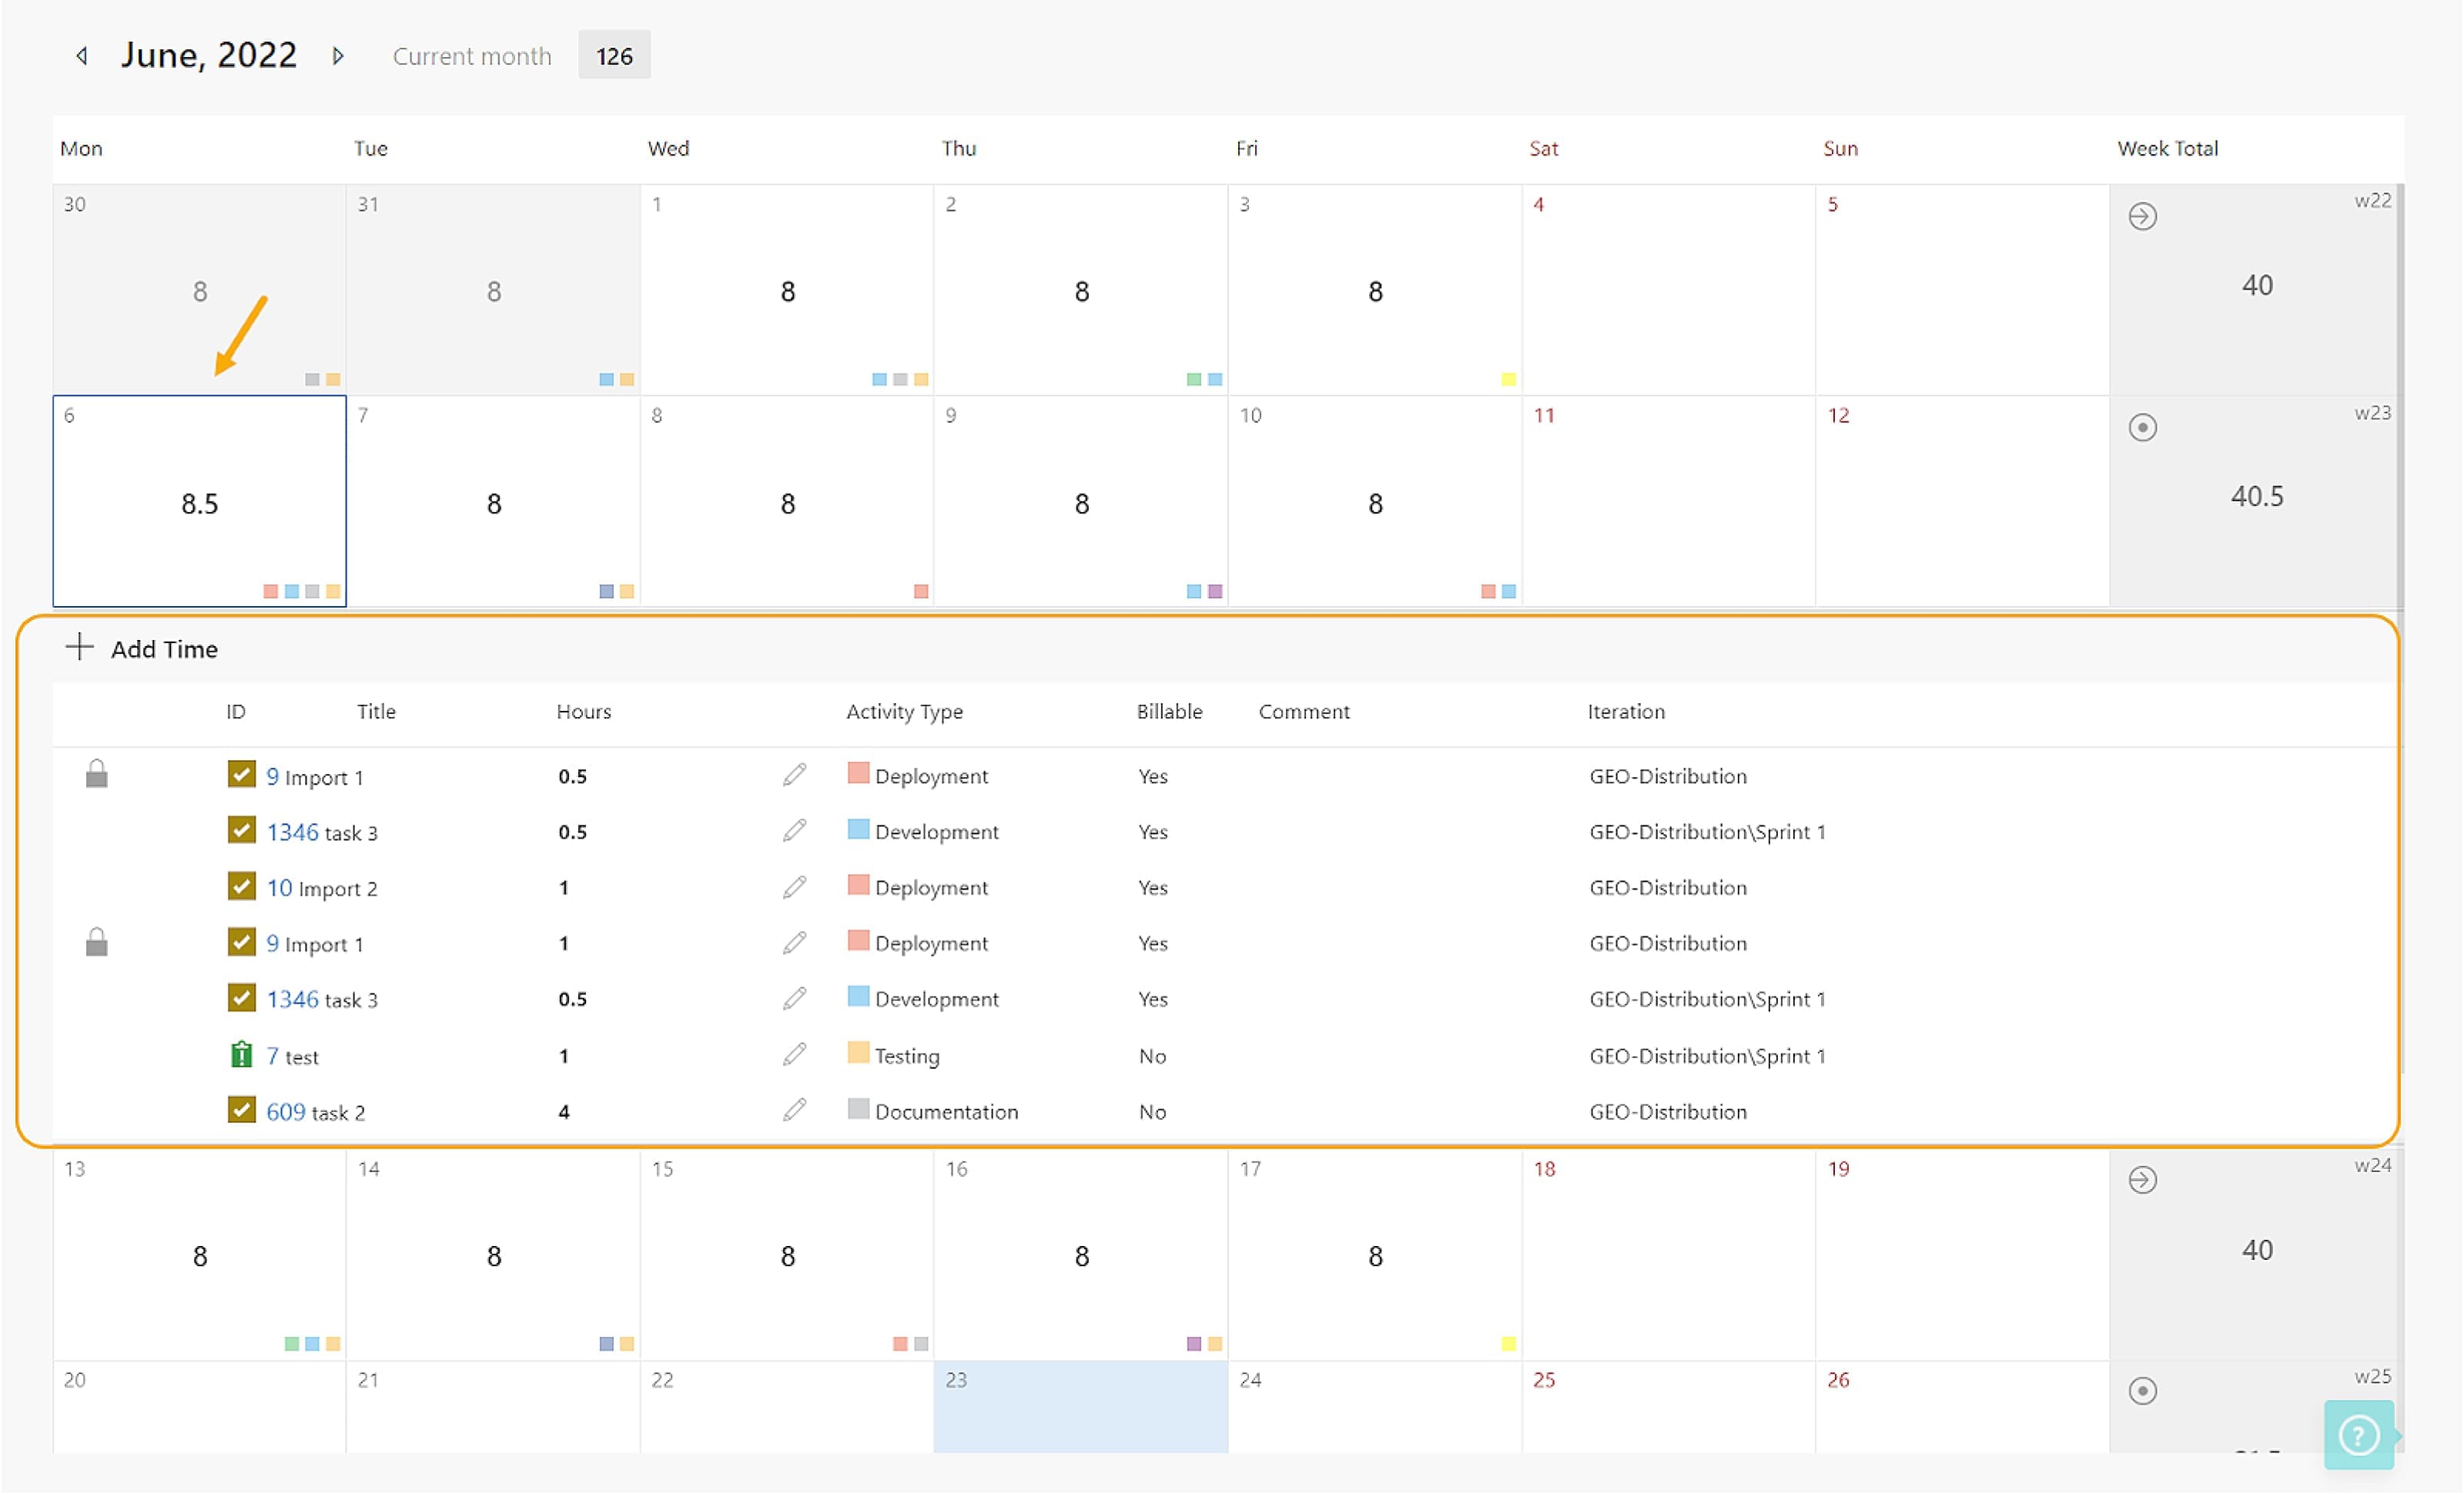
Click the edit icon to open the “Edit time” window, where you can adjust the duration, start and end time, activity type, and billable hours.
One exception to editing work logs: Your admin can lock time entries after a work item is completed. A lock icon means the log can’t be edited or removed, preventing changes to time data after the work is done.
The Monthly view is comprehensive, displaying a wide range of time data and allowing quick updates.
Most developers use it to review their stats at the end of the month, seeing everything in one place without navigating through multiple screens.
Summary
In 7pace Timetracker for Azure DevOps, you can log and manage time data in four ways:
- Item view,
- Weekly view,
- Timesheet view,
- Monthly view.
Each time-tracking method serves different purposes, making the app versatile for all types of developers.
Managers benefit too, with a bird’s-eye view of team time data, advanced reporting, and quick export options for tracking valuable metrics.
If you haven’t tried 7pace Timetracker for Azure DevOps yet, you can test it free for 28 days.
Start my free trial